
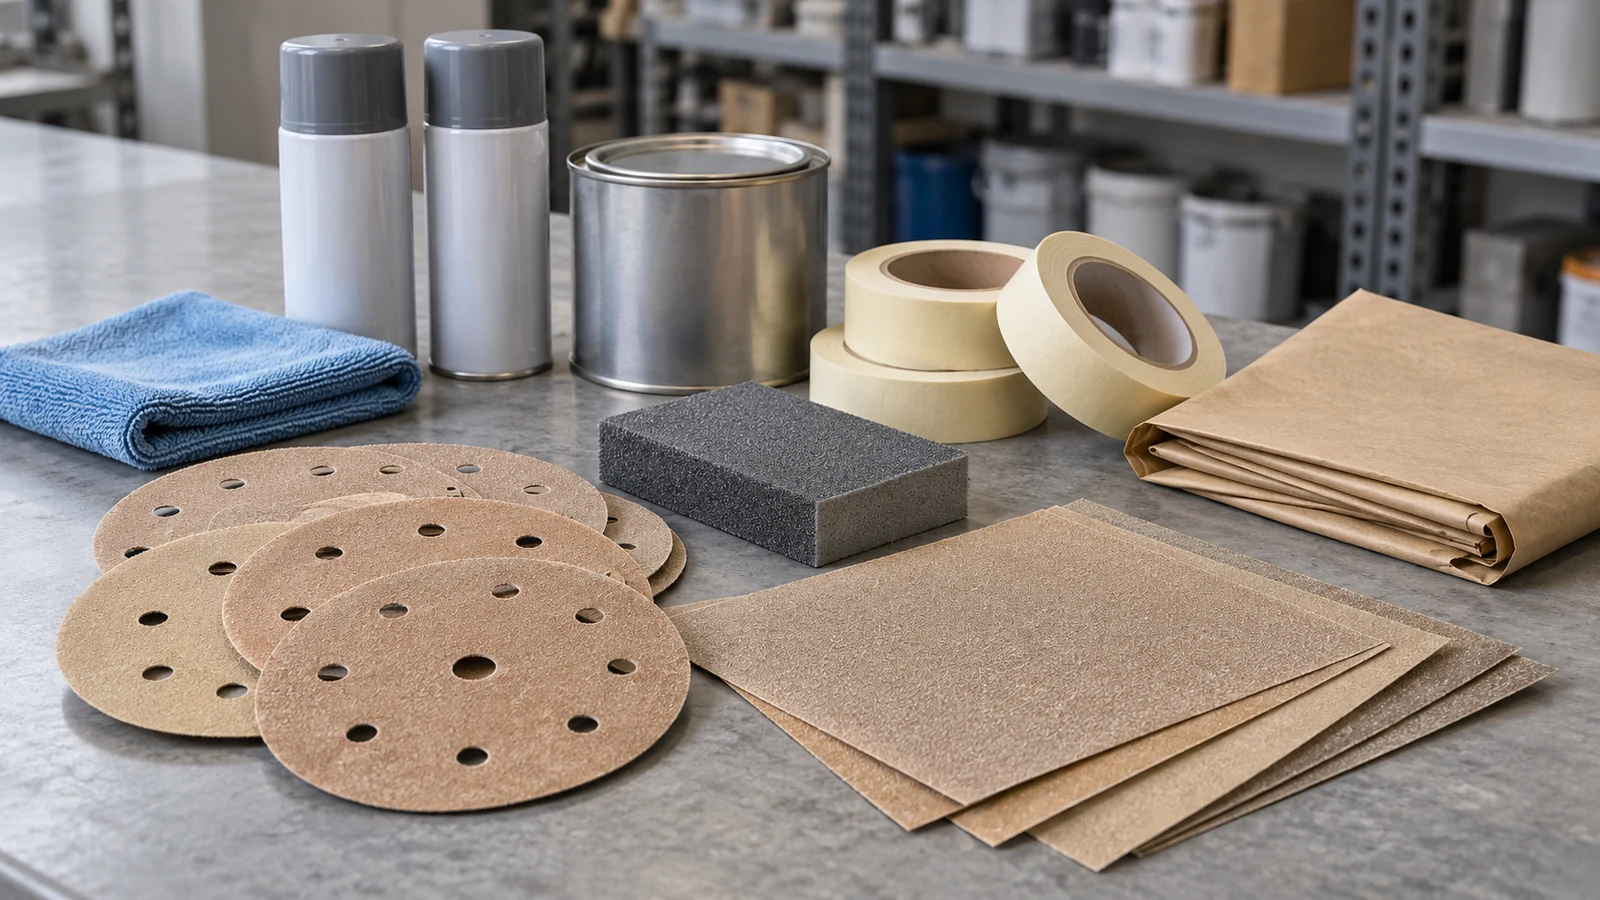
August is a good month for body work in Bowie. The air is dry, surface temperatures are high enough that primer and clear flash quickly, and the shade of an open shop door is bearable if you start early. It is also the month when the hail dent you have ignored since spring, or the rusty rocker on the ranch truck, starts to look like a project worth finishing. Bowie sits in Montague County about 35 miles north of our counter in Decatur, a 35 to 40 minute run down US-287, and it is a part of the world with real oilfield and agricultural activity - which means the vehicles here take rock chips, gate scrapes, and sun. Body shops in the Bowie area already know the supply list. This guide is for everyone else: the honest sequence a panel repair actually follows, and what you need on the bench before you start.
Body Work in Bowie and Montague County: What the Job Actually Involves
The biggest reason DIY paint work goes wrong is not skill with a spray can. It is sequence. Paint is the last five percent of the job and the first thing people buy. Everything that makes a repair look invisible happens earlier, in metal work, rust treatment, filler shaping and grit progression.
A realistic panel repair runs like this: assess the damage, strip the area to clean substrate, deal with rust properly, restore shape with filler, refine with glazing putty, sand through a controlled grit progression, degrease, mask, prime, block the primer, apply color, apply clear, then cut and polish. Skip a step and the panel will tell on you in raking sunlight six months later.
Around Bowie, one more factor matters: dust and wind. An open ranch shop with a dirt floor and a west wind is a hard place to lay clear coat. Wetting the floor and working early, before the wind picks up, does more for a finish than any product on the shelf.
Being Straight About What We Do and Do Not Do
We are a retail parts and supply counter, so it is worth stating plainly what that means for a paint job.
We stock auto body and paint supplies: filler, glazing putty, hardeners, spreaders, sandpaper in sheets, rolls and discs, sanding blocks and boards, wax and grease remover, masking tape and masking paper, seam sealer, aerosol primers, aerosol paints and clears, abrasive pads, buffing and polishing compounds, body hammers and dollies, rust treatments, and the tapes, gloves and respirator supplies that go with them. Our auto body and paint section is where all of that lives, and it is the same shelf the area shops pull from.
We do not do body work, we do not paint vehicles, and we do not mix paint or match paint colors to your vehicle. There is no mixing bank at our counter and no color camera. What we sell in color is packaged product, and matching it to a faded twelve-year-old clear coat is a job for a shop with a spray booth and a mixing system. If your repair needs a sprayed panel blended into the ones beside it, hire that out - and buy your abrasives, filler, tape and prep chemicals from us while you do the metal work yourself. Plenty of body shops in the Bowie area handle just the spraying for customers who did their own bodywork.
Step One: Assessment, Before Anything Gets Bought
Put your hand flat on the panel and slide it across the damage with your eyes closed. Your palm reads high and low spots better than your eye does, especially on a curve. Then sight down the panel at a shallow angle with a light behind you, which turns invisible waves into visible ones.
Now decide what you are dealing with. A shallow dent with unbroken paint may pop out with heat and careful pressure from behind, needing nothing but a polish. A crease has stretched metal and will always need filler. A rusted-through area is not a paint problem at all - it is a metal problem wearing paint. Plastic bumper covers need flexible products and their own adhesion promoter, not the rigid filler you would put on a fender.
Measure the area, because that determines how much of everything you buy. A rocker panel is a different order of magnitude in abrasives, tape and paper than a fist-sized dent. Underbuying abrasives is the most common reason a Saturday project turns into a two-weekend project - paper loads up and stops cutting long before people expect.
Rust: Treat It Properly or Repeat the Job
Rust is the one failure that comes back. Paint over active corrosion and it will lift the repair from underneath within a season, no matter how good the finish looked when you rolled it out of the shop.
Start by determining whether the metal is still there. Tap it and press it. If a screwdriver goes through, no chemical fixes that; the section has to be cut out and replaced, which means welding and a different set of supplies. If the metal is solid but surface-rusted, mechanical removal with an abrasive disc, wire wheel or blasting media back to bright steel is the most thorough route. Chemical converters and phosphoric-acid treatments neutralize what remains in pits and seams you cannot reach - as long as you follow the product's dwell and wipe instructions rather than guessing.
Bare steel needs timely corrosion protection, but the filler and primer sequence is product-specific. Read the technical data sheets for the complete system before applying anything. Some fillers are approved for prepared bare metal; others can go over specified epoxy within a defined cure or recoat window. Do not assume every epoxy accepts every filler.
Body Filler, Done the Way Shops Do It
Filler has a bad reputation earned entirely by misuse. Used correctly, in thin layers over properly prepared metal, it is exactly what every professional shop uses.
Use the filler maker's approved substrate, surface preparation, thickness limit, hardener ratio, temperature, and cure instructions. Bare abraded metal or a compatible epoxy may be permitted; an unknown paint film, active rust, or an incompatible primer is not a sound base. Mix without trapping air and apply the specified thin layers. Deep damage needs proper metal assessment rather than enough filler to hide it.
Shape it in the cheese-hardened stage, the short window where a body file or 40 grit cuts easily and it has not gone rock hard. Working in that window saves an enormous amount of sanding. Use a long block or board, not your fingers, kept flat and moving in a cross-hatch pattern. Fingertip sanding creates the low, wavy repairs that catch light.
Glazing Putty and Feather Edges
Once shape is right you will still have pinholes, sand scratches and a hard edge where filler meets paint. That is what glazing putty is for: a fine, easy-sanding polyester product that fills 80 to 180 grit scratches primer alone cannot bridge. Apply it thin, in one or two passes, and sand with 180 then 220.
Feather edging is the skill that separates a repair you cannot find from one you can. The transition from filler to primer to old paint must be tapered over inches, not millimeters, so no step remains for light to catch. Run your fingertips across the edge with a clean cotton glove; if you can feel a ridge, primer will not hide it, and clear coat will magnify it.
The Grit Progression from 40 to 2000
Each grit exists to remove the scratches of the previous grit. Skipping steps leaves deep scratches that show through paint, and jumping too fine too early means you polish scratches instead of removing them. A workable progression:
- 40 to 80 grit: shaping cured filler and stripping paint or heavy rust
- 80 to 180 grit: leveling filler and feathering edges
- 180 to 220 grit: final filler and glazing putty, and scuffing for primer
- 320 to 400 grit: blocking primer, dry or wet, to find waves and level the surface
- 400 to 600 grit: final surface before color, and scuffing adjacent paint for blending
- 800 to 1000 grit: wet sanding runs, dust nibs or orange peel in clear
- 1500 to 2000 grit: final leveling of clear before compounding and polishing
Keep a guide coat in the process. A light dusting of contrasting dry guide coat over primer, blocked with 320 or 400, shows every low spot as a dark speck and every high spot as bare cut primer. Buy paper in more grits and larger quantities than you think you need; our general auto parts shelves and our body and paint supplies sit under the same roof, so one trip can cover abrasives, chemicals and any mechanical parts the same project needs.
Wax and Grease Remover: The Step Everyone Skips
Silicone, wax, road tar, diesel film, hand oils and tire dressings all cause the same failures: fisheyes, craters and adhesion loss. Sanding does not remove contamination; it spreads it into the scratches.
Use wax and grease remover before you sand, again before you prime, and again before you paint. Technique matters: apply with one clean cloth, then wipe dry with a second before it evaporates on its own. Let it flash off unwiped and you have only redistributed the contaminant. Change cloths often, and never use a rag washed with fabric softener.
Then use a tack cloth just before spraying to lift dust, and blow the panel edges and jambs out with air first, because trapped dust in a door jamb will find its way onto wet clear. On a ranch or oilfield truck out of the Bowie area, expect the panel to be dirtier than it looks and plan two rounds of cleaning.
Masking Without Hard Lines
Bargain-bin masking tape is a false economy: it bleeds, it lifts, and it leaves adhesive baked onto trim in August heat. Use automotive-grade tape, and use the right width for the job - narrow for curves and trim edges, wider for holding paper.
Two techniques worth knowing. Back-masking - folding the tape edge back on itself so paint lands on a soft rolled edge - avoids the hard ridge a straight tape line creates when you stop color mid-panel. And for blending, do not mask the blend edge at all: scuff the adjacent area with 600 or finer, spray color progressively lighter into it, and let clear carry to the natural break.
Mask further out than the spray area. Overspray drifts, and aerosol overspray drifts farther than most people expect. Cover glass, tires, and anything downwind, especially in an open shop.
Primer: Epoxy, Self-Etching, or High-Build
Three primers, three different jobs, and choosing wrong is a common DIY error.
An approved epoxy primer can provide adhesion and corrosion protection on prepared bare metal. Whether filler may be applied over it depends on the epoxy and filler data sheets, cure state, and recoat window. Confirm compatibility for the specific products instead of treating epoxy-first as a universal repair sequence.
Self-etching primer contains an acid that bites into bare metal for adhesion on small areas. It is convenient in aerosol form for chips and small spot repairs, but it must not go under or over filler, and it should not be built thick.
High-build primer surfacer fills minor sanding marks and supports leveling. It does not repair rust holes or replace the required corrosion-protection layer. Apply only the specified film thickness and compatible undercoats, then sand according to that product system's instructions.
Let each primer flash and cure for the time the label states before sanding, and always give the last primer coat a final scuff and a degrease before color. Products like Permatex and CRC that we carry cover much of the surface prep and cleaning side of this work; our brands page lists the makers we stock.
Aerosol Technique, Color, and Clear
Read each aerosol label and safety data sheet before use. Observe its spray distance, temperature limits, ventilation, ignition controls, and required eye, skin, and respiratory protection. Do not heat a pressurized can unless its manufacturer expressly permits a defined method. A dust mask does not protect against solvent vapor. Two-component coatings may contain isocyanates and need a professional exposure-controlled setup; leave unfamiliar or hazardous spray systems to a properly equipped body shop.
Apply the number, thickness, and flash time of coats specified by the paint and clear-coat manufacturers. Do not assume a universal three-coat schedule or that unrelated color and clear products are compatible. August heat can alter flow and drying; work only within label conditions and keep bystanders away from overspray.
Let clear cure hard before touching it. Then wet sand nibs and orange peel with 1500 to 2000, compound with a foam or wool pad, follow with polish, and wax or seal only after the recommended cure period. Rushing the polish stage on soft clear leaves swirl marks and burned edges.
What DIYers Get Wrong Most Often
The recurring list, from questions we field at the counter: sanding with fingers instead of a block; using filler to hide dents that needed metal work; painting over active rust; skipping wax and grease remover; no guide coat; laying color too heavy; ignoring flash times; feather edging too abruptly; buying too little abrasive; and expecting an aerosol repair to match aged factory clear exactly. Accept that last one up front - a spot repair on a sun-faded panel will be close, not invisible.
Planning the Trip from Bowie So You Only Make It Once
Bowie to our counter at 803 W Main St in Decatur is about 35 miles down US-287, 35 to 40 minutes each way. That is not a trip to make three times in a weekend because you ran out of 180 grit. So build the list before you start, and call ahead.
Call first and tell us what the repair is - panel, size, rust or no rust, steel or plastic - and what stage you are at. We can tell you what is on the shelf, and if something has to be brought in, most special orders arrive within one to two business days. Have year, make and model handy too, in case the project needs clips, fasteners, trim retainers or lights from the parts side. To check stock before you head south, call (940) 627-2350.
Note our hours when you plan a weekend project: Monday through Friday 8:00 AM to 5:30 PM, Saturday 8:00 AM to 1:00 PM, and closed Sunday. Run out of 400 grit while blocking primer on Saturday afternoon and it is a Monday problem, so buy extra on the way in. We have been locally owned and operated since 1985, and much of what we know about staging a job came from area shops working this same sequence.
Shops, Ranch Trucks, and the Rest of the County
We serve body shops out of Bowie and Montague County alongside farm, ranch, oilfield and DIY customers across Wise County, and the supply conversation is the same on both sides of the counter, just at different volumes. Shop accounts and contractor relationships are discussed by phone. Our customer reviews give a sense of how we handle counter questions, and the Bowie service area page has the route details and the customer types we see from that direction.
Safety reference: OSHA automotive spray-paint respiratory guidance. Use the instructions for your exact vehicle, machine, and product.
Frequently Asked Questions from Bowie Customers
Does Holmes Auto Supply mix or match automotive paint?
No. We stock body and paint supplies - filler, putty, abrasives, prep chemicals, tape, primers, aerosol paint and clear - but we do not mix paint, we do not tint, and we do not match colors to a vehicle. Matching a faded finish is work for a shop with a mixing system and a booth, and several body shops in the Bowie area handle exactly that.
Can you do the body work on a truck brought to the counter?
No. We are a retail counter, not a body shop. We sell the supplies and help you figure out which ones the job needs, but we do not perform body work, paint, or any repairs, and we do not come out to your place. Many of the shops that do this work in Bowie and Wise County buy their materials from us.
What grit sandpaper is the starting point on a dented fender?
Scuff bare metal and the surrounding area with 80 grit before filler, shape cured filler with 40 to 80, level with 80 to 180, then finish filler and glazing putty at 180 to 220. Block primer with 320 to 400 and go to 600 before color. Buy several grits at once - the drive from Bowie is too long to make twice.
Which is right, epoxy primer or self-etching primer?
They do different jobs, and product compatibility decides the sequence. Epoxy can provide corrosion protection; self-etching primer promotes adhesion on approved bare substrates; high-build surfacer helps leveling. Follow the filler and primer data sheets for allowed combinations, cure windows, and sanding. Do not layer products just because a generic sequence says to.
How far ahead should supplies be bought for a weekend project?
Buy everything by Friday, or Saturday morning at the latest. Our hours are Monday through Friday 8:00 AM to 5:30 PM and Saturday 8:00 AM to 1:00 PM, and we are closed Sunday, so a Sunday sanding session has no backup. Call (940) 627-2350 with your list and we will check the shelf while you are on the line. More counter details are on our FAQ page.